Overview
Main page
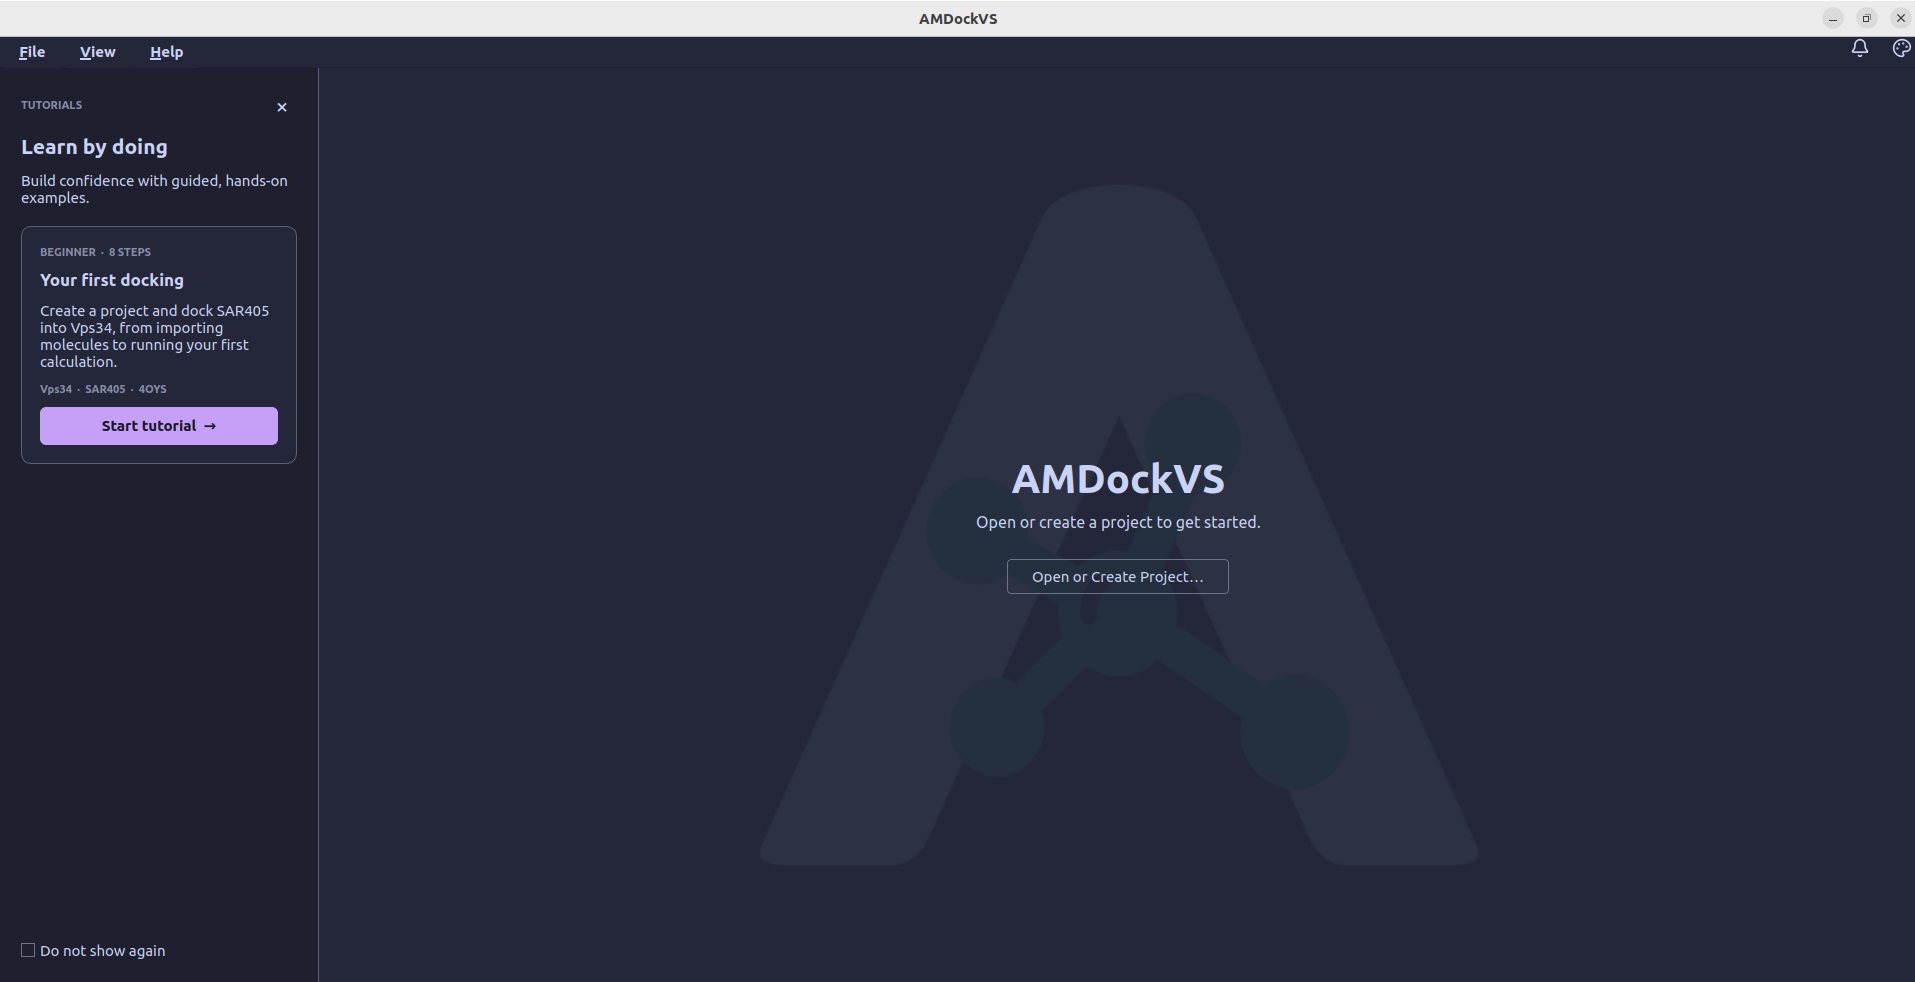
The main page appears when AMDockVS starts without an open project. The center of the window contains the project controls, while the tutorial card stays visible alongside them. From here, you can open an existing project, create a new one, or start the guided docking example.
Projects
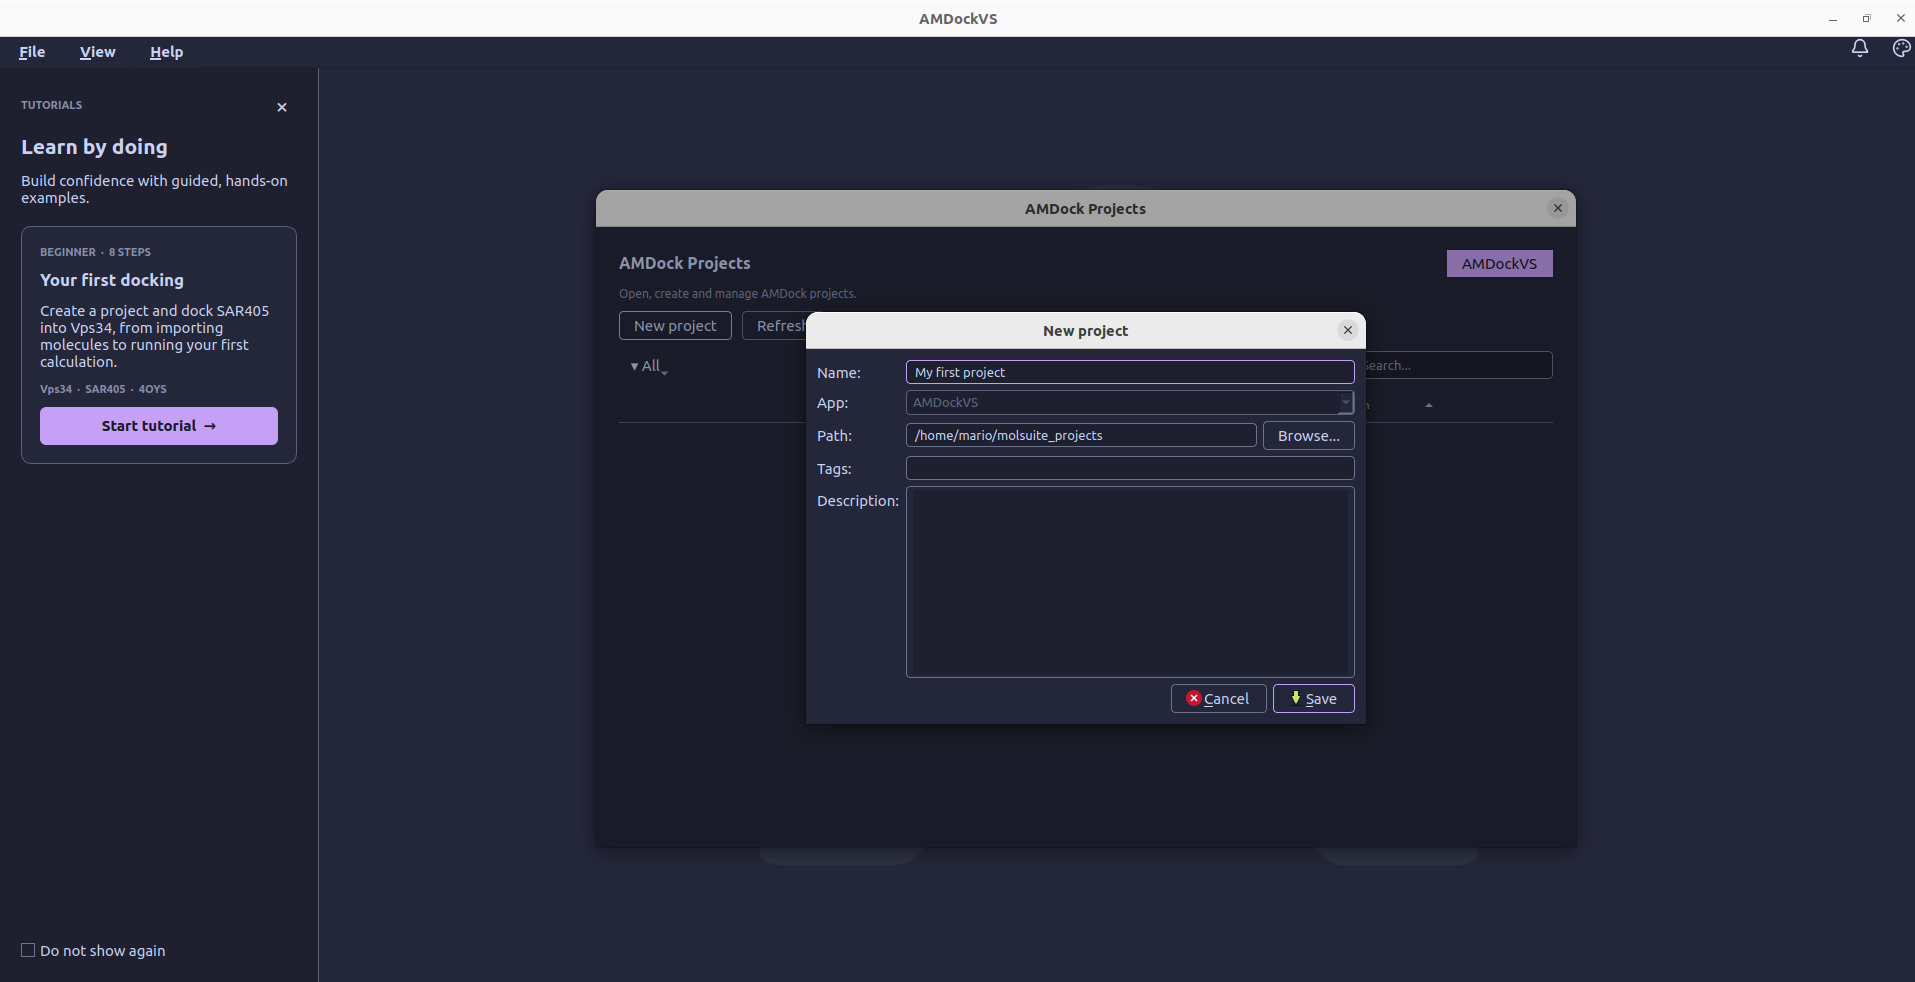
Select Open or Create Project... to open the AMDock projects dialog. It lists the projects registered with AMDockVS so you can choose one to open or create a new project. Use New project to enter a name and storage folder; you can also add tags and a description to help identify the project later. After you save, AMDockVS opens the new project in the workspace.
An AMDockVS project represents one docking study or screening campaign. It groups the molecule records, settings, jobs, and results for that work in one project folder. Its main files are:
project.db, a SQLite database containing molecule records, sets, binding sites, docking results, and interactions.volumes/stores structure data such as imported molecules, prepared inputs, and docking poses. The database keeps references to these structures.executor.dbrecords job state.config.tomlstores project-specific settings.
Folders for models, pockets, shards, and docking artifacts are added as those features are used. See Where your data lives for the full folder layout and backup guidance.
Workspace
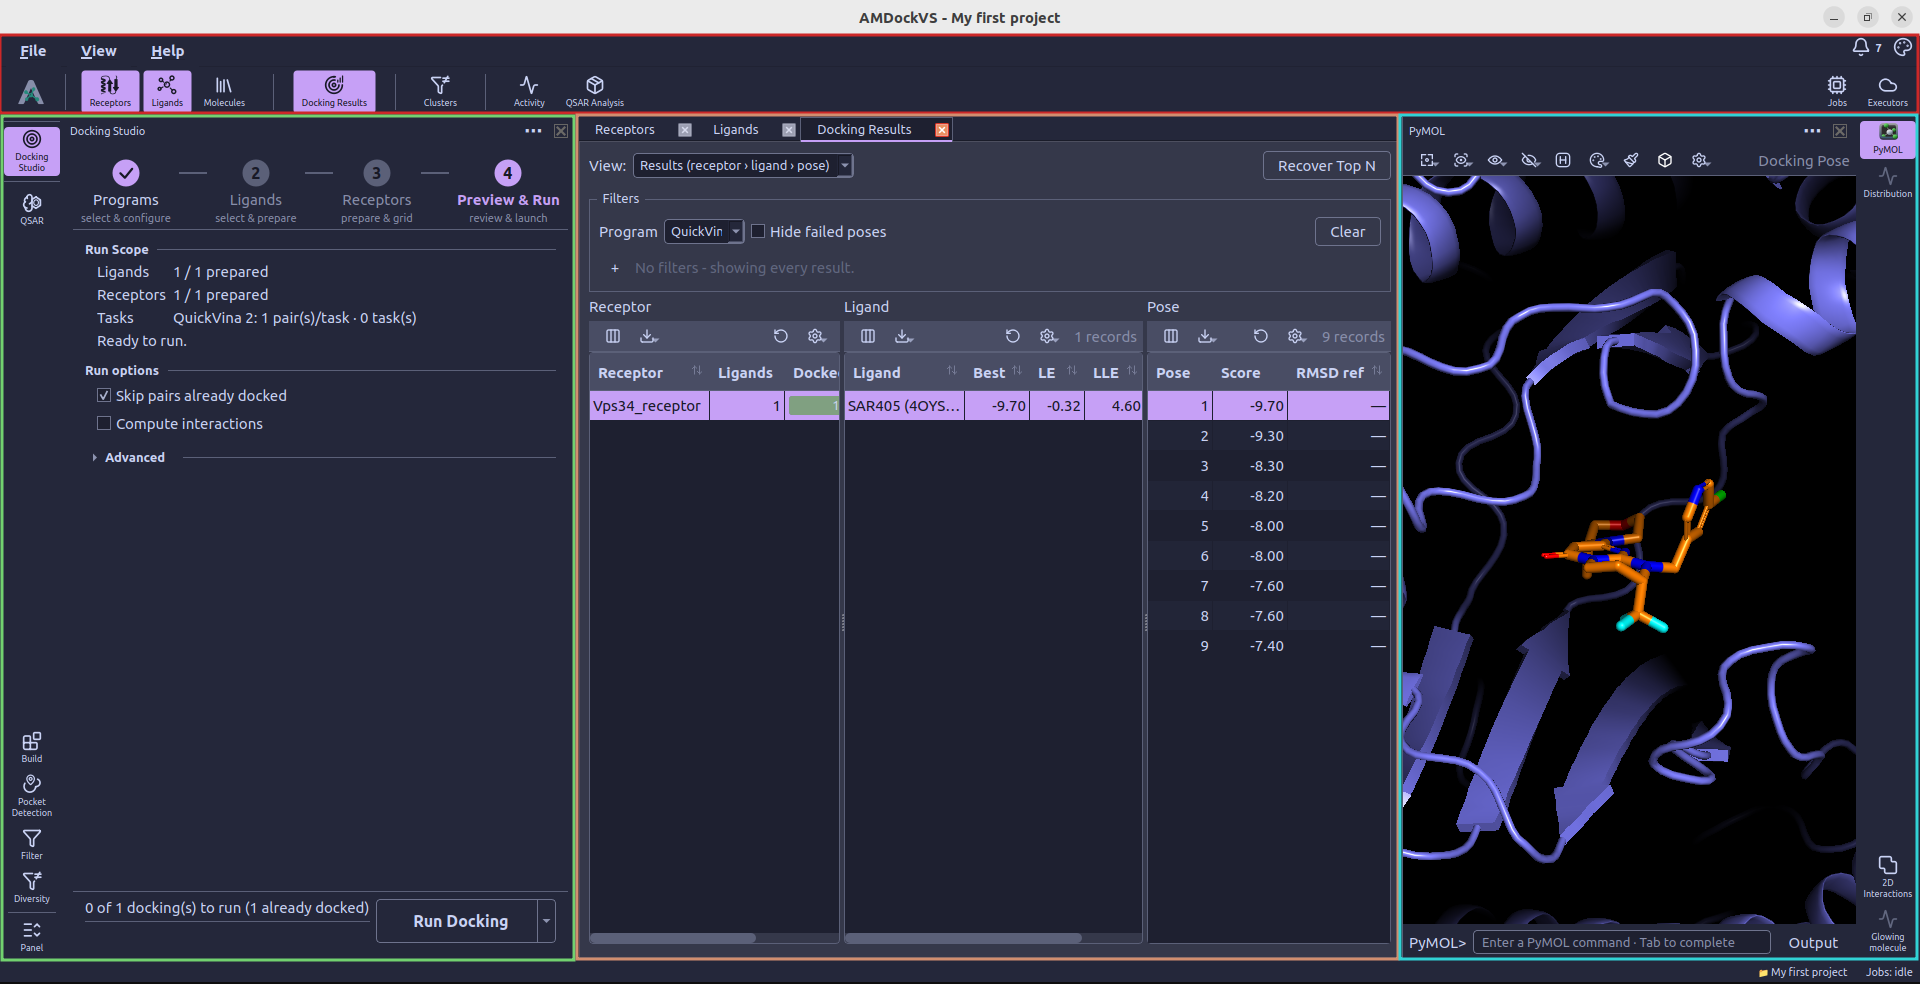
AMDockVS opens projects in a dockable, multi-panel workspace. Each workspace contains three main areas:
- The top catalog and result views in the center open as tabs (e.g., receptors and ligands tabs, docking results)
- The left tool rail opens one task panel at a time (e.g., docking studio, QSAR)
- The right tool rail open visualization panels (e.g., PyMOL, 2D contacts)
Next, we describe the tools and panels available in AMDockVS.
Top catalog
- Receptors — Import one or more receptor structures from databases or local files.
- Ligands — Import ligand files, set molecule types, and choose whether to store a screening library as shards.
Main analysis tools
- Docking Studio — Configure docking programs, prepare molecules and launch runs.
- QSAR — Build models from activity data and apply them to ligands or screening libraries.
Secondary analysis tools
- Build — Prepare small molecules and proteins, including 3D conformer generation.
- Pocket Detection — Predict potential binding sites.
- Filter — Apply criteria to small-molecule records.
- Diversity — Cluster compounds by molecular similarity and choose representatives.
Visualization tools
- PyMOL — Visualize molecules and their interactions in 3D.
- 2D Interactions — Inspect molecular interactions in 2D diagrams.
Job monitoring
- Jobs monitor — Follow background jobs, inspect progress and errors, and cancel, resume, or move work between executors.
Tutorial
The Your first docking card starts an eight-step, hands-on walkthrough using the Vps34 receptor and SAR405 ligand. It guides you through creating a practice project, importing the example molecules, opening Docking Studio, choosing AutoDock Vina, preparing the ligand, defining and activating the docking box, preparing the receptor, and launching the calculation. You perform each action in the application as the tutorial guides you through the workflow. The tutorial ends when the docking job is submitted; poses and scores appear in Docking Results after the calculation finishes.
Watch the complete tutorial, from creating a practice project and importing the example molecules to defining the docking box, running docking, and viewing the poses and scores.