2D Interactions
2D Interactions displays a protein-ligand contact diagram for the pose selected in Docking Results. Open the panel from the right tool rail. It appears below PyMOL so that the diagram and the 3D complex can be inspected together.
The panel follows docking poses. Selecting an undocked ligand in the Ligands catalog does not create a contact diagram.
1. Select a docking pose
Open Docking Results, select the receptor and ligand, then choose a pose in the pose table.
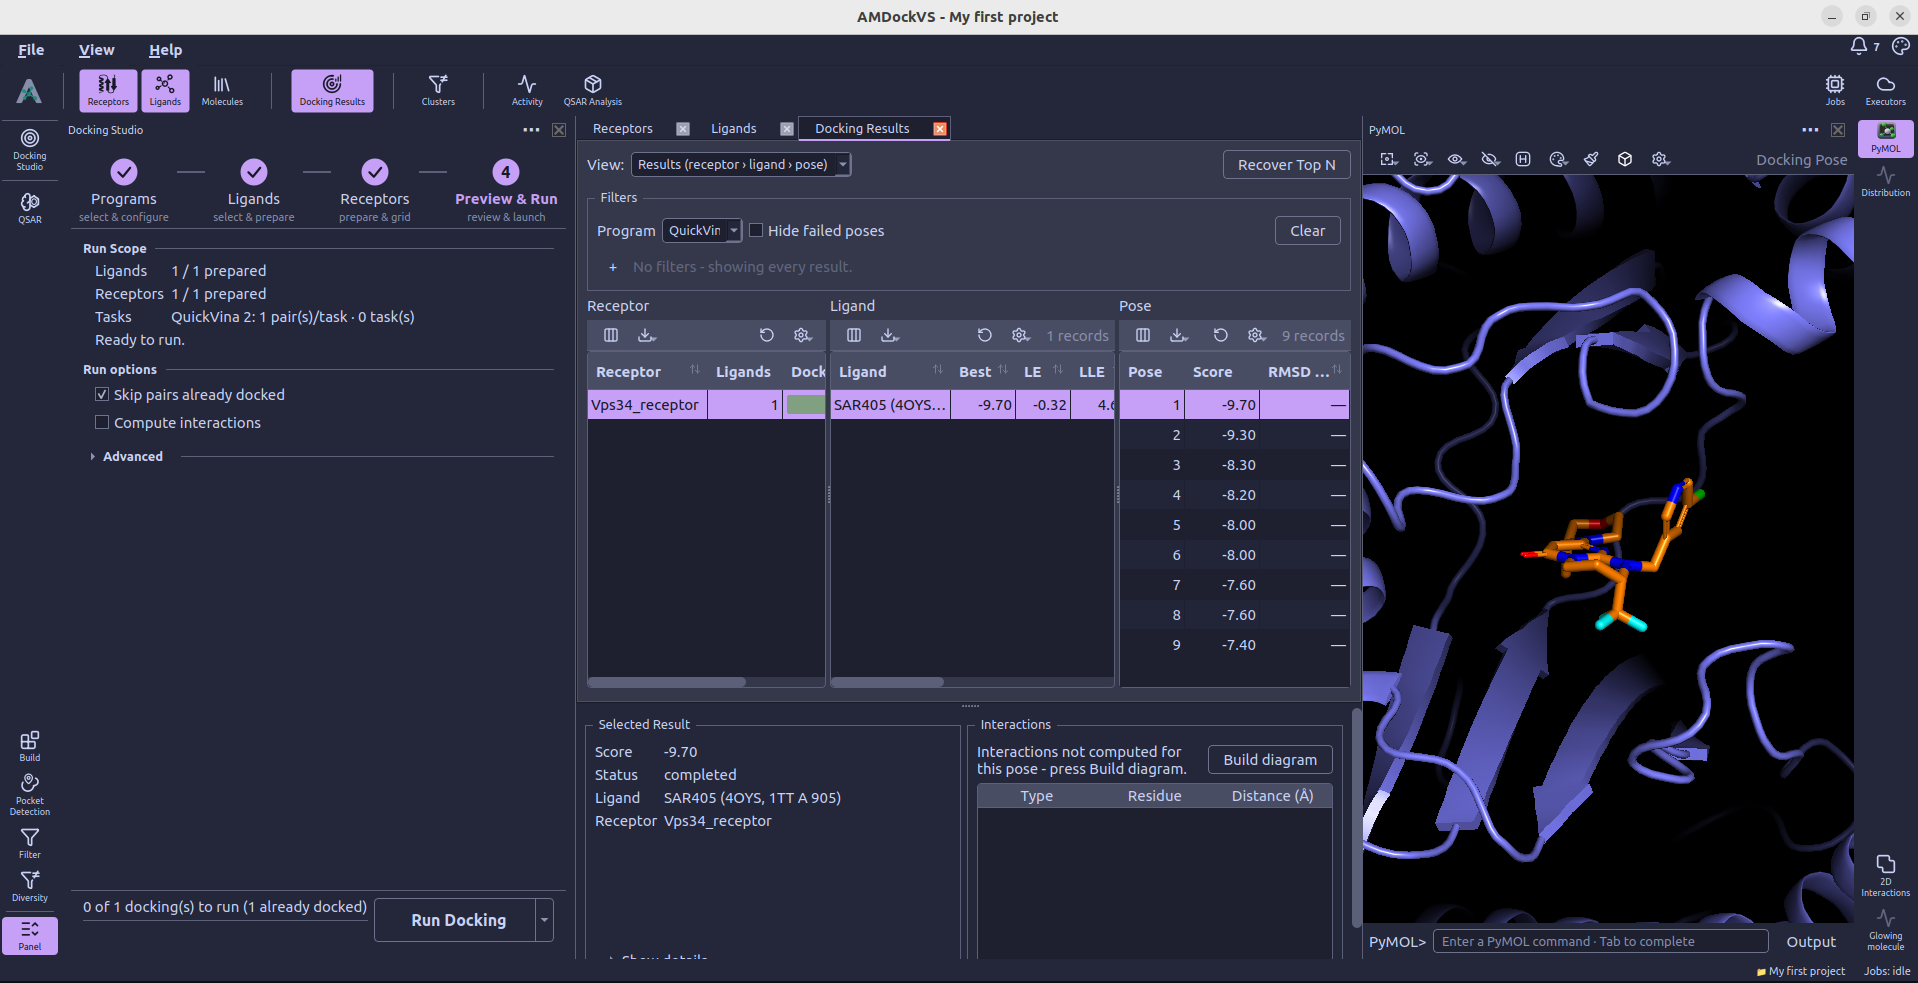
2. Build the diagram
Choose Build diagram in the selected result's Interactions section, or in the 2D panel's empty-state prompt. AMDockVS detects the contacts, calculates their diagram layout, and saves the result with that pose.
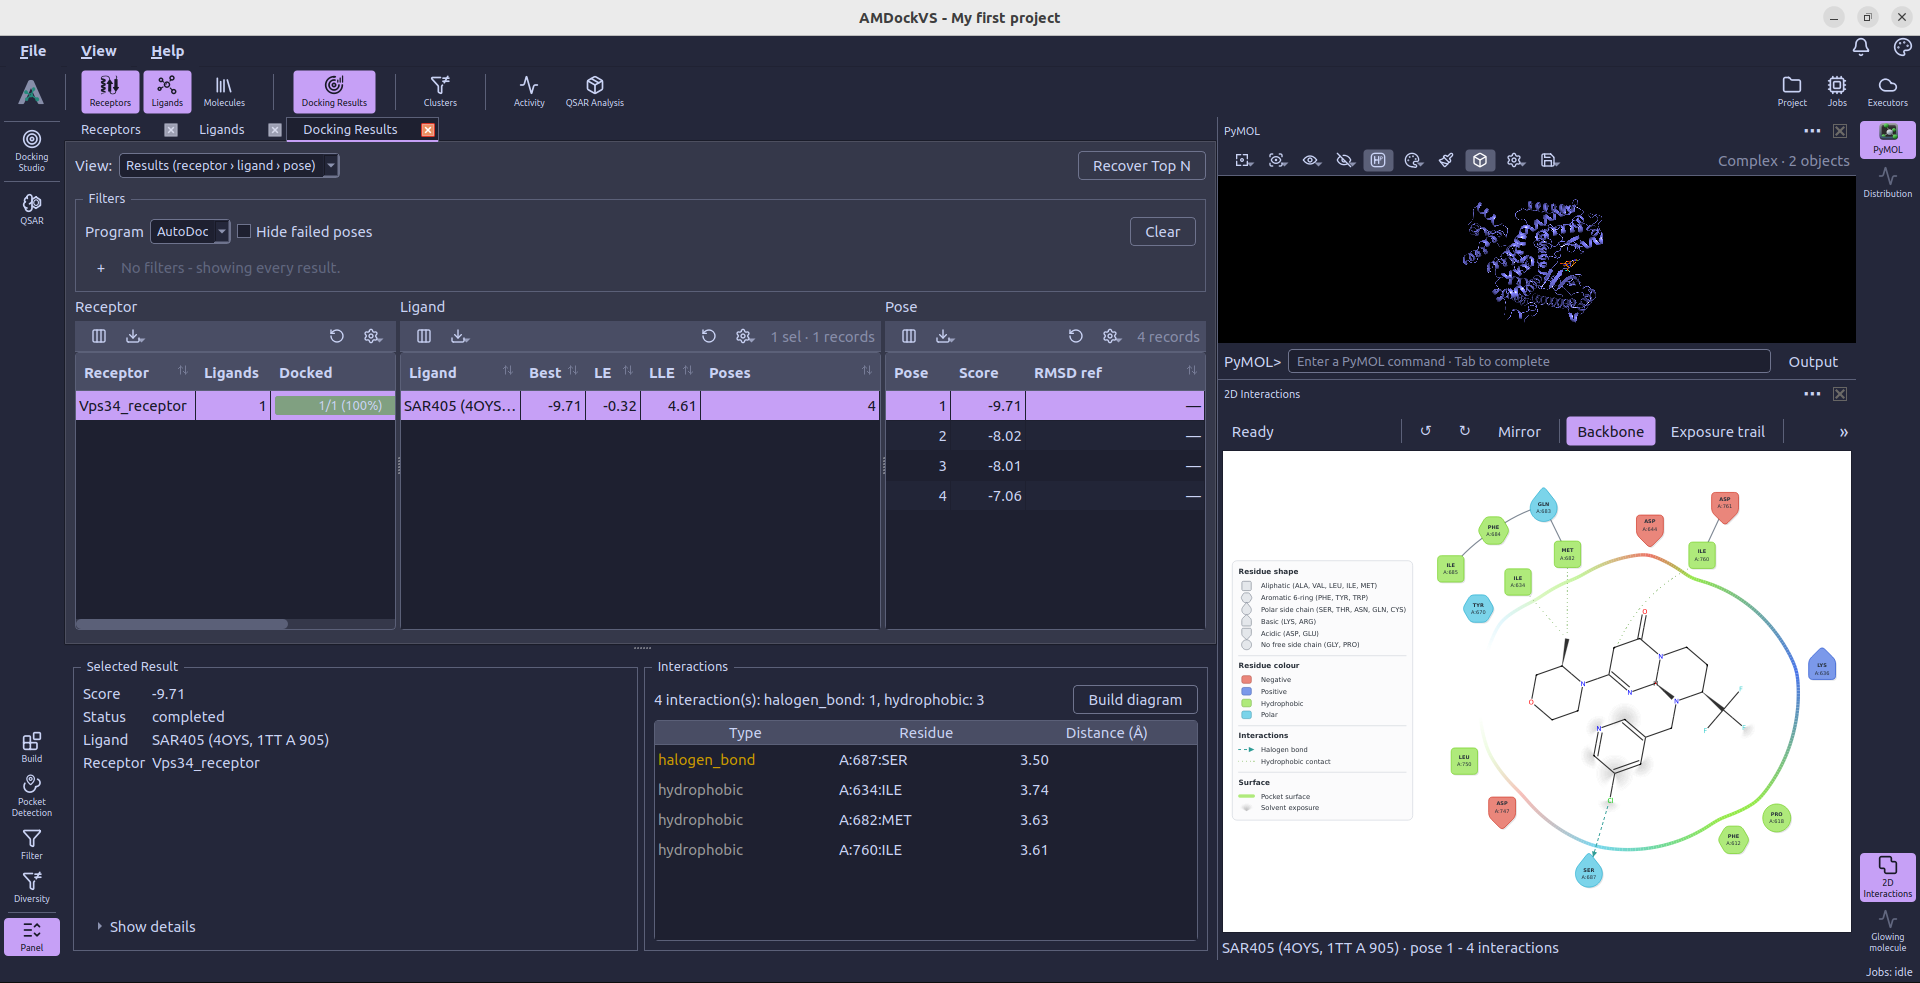
The screenshot shows the starting point for a pose without a computed diagram. Once calculation finishes, the 2D panel opens automatically with the contact map and reports the ligand name, pose number, and interaction count.
To analyze poses as docking finishes, enable Compute interactions in Docking Studio → Preview & Run. This populates the stored contact data. If a pose has no saved diagram layout, use Build diagram when reviewing it.
3. Read contacts alongside the 3D structure
The contact map places the ligand and interacting residues in a 2D layout. Use its legend to identify the interaction types and compare the diagram with the selected complex in PyMOL.
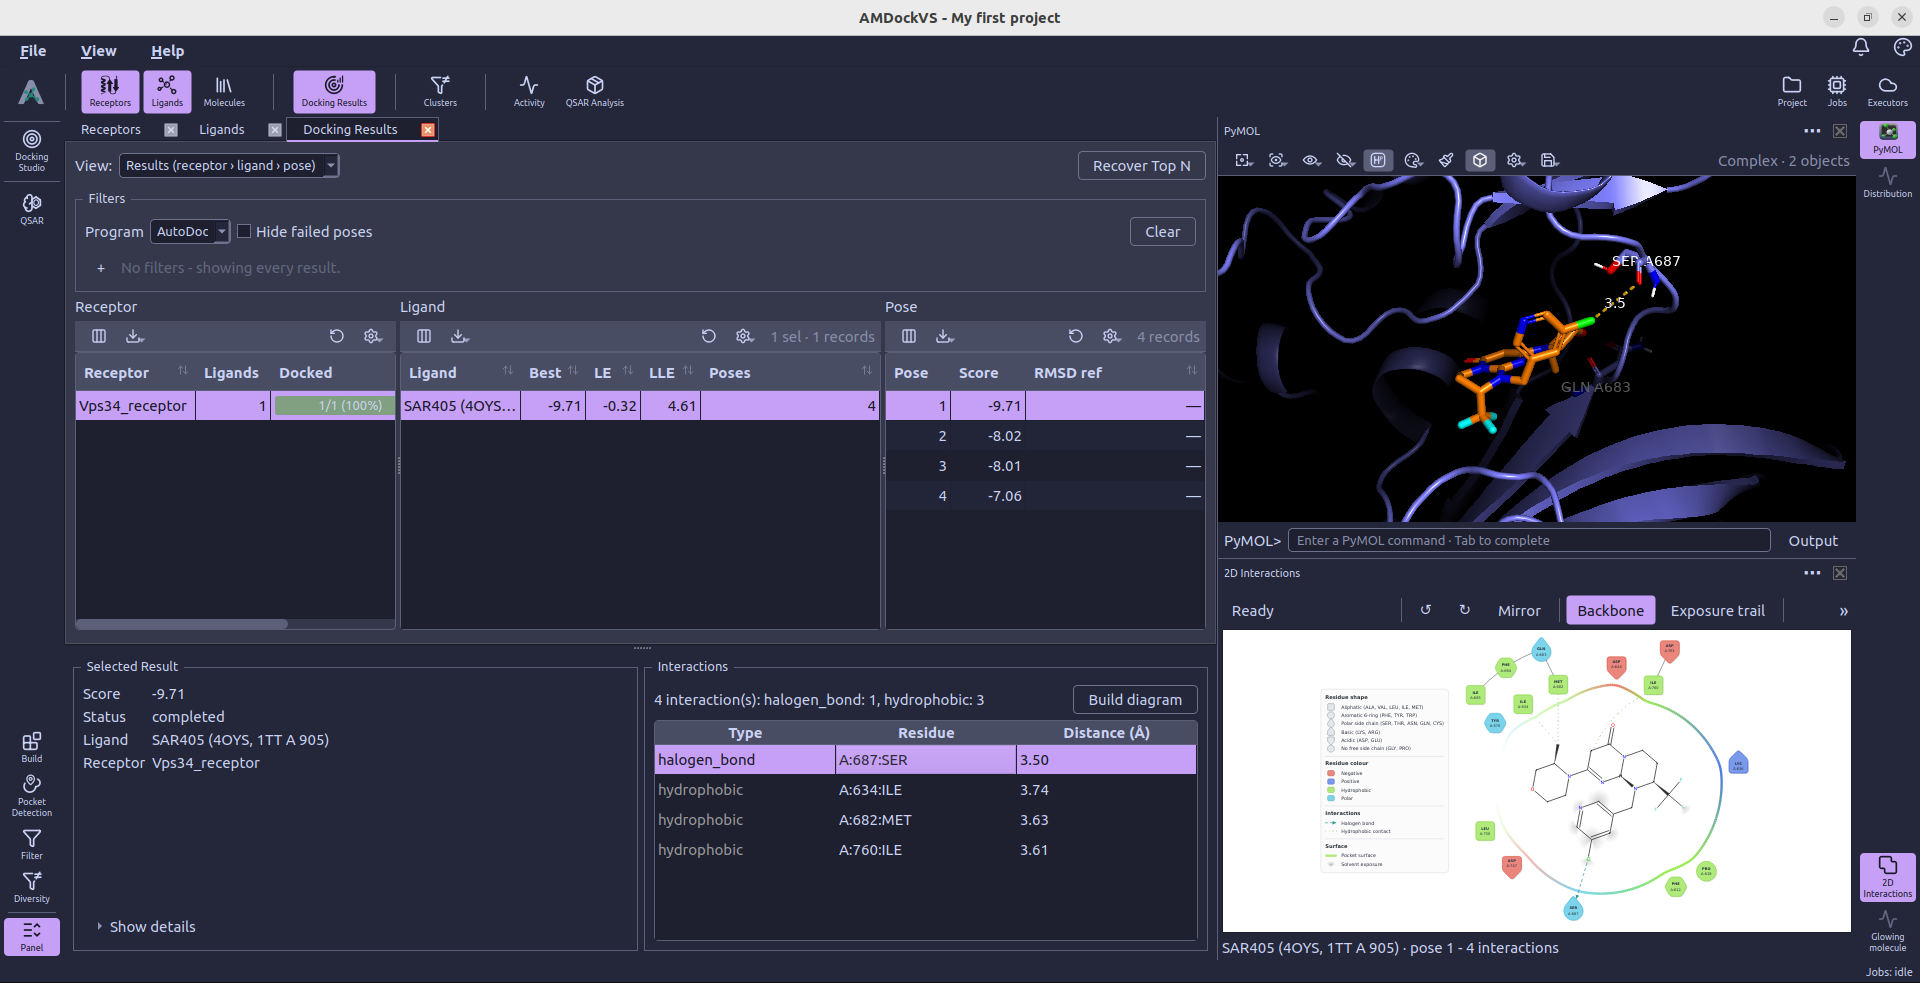
Select a residue in the diagram to inspect it in the 3D viewer. You can also select a row in the result's interaction table to display that individual contact in PyMOL. This makes it possible to check a contact's position in the structure as well as its reported type and distance.
4. Adjust the diagram layout
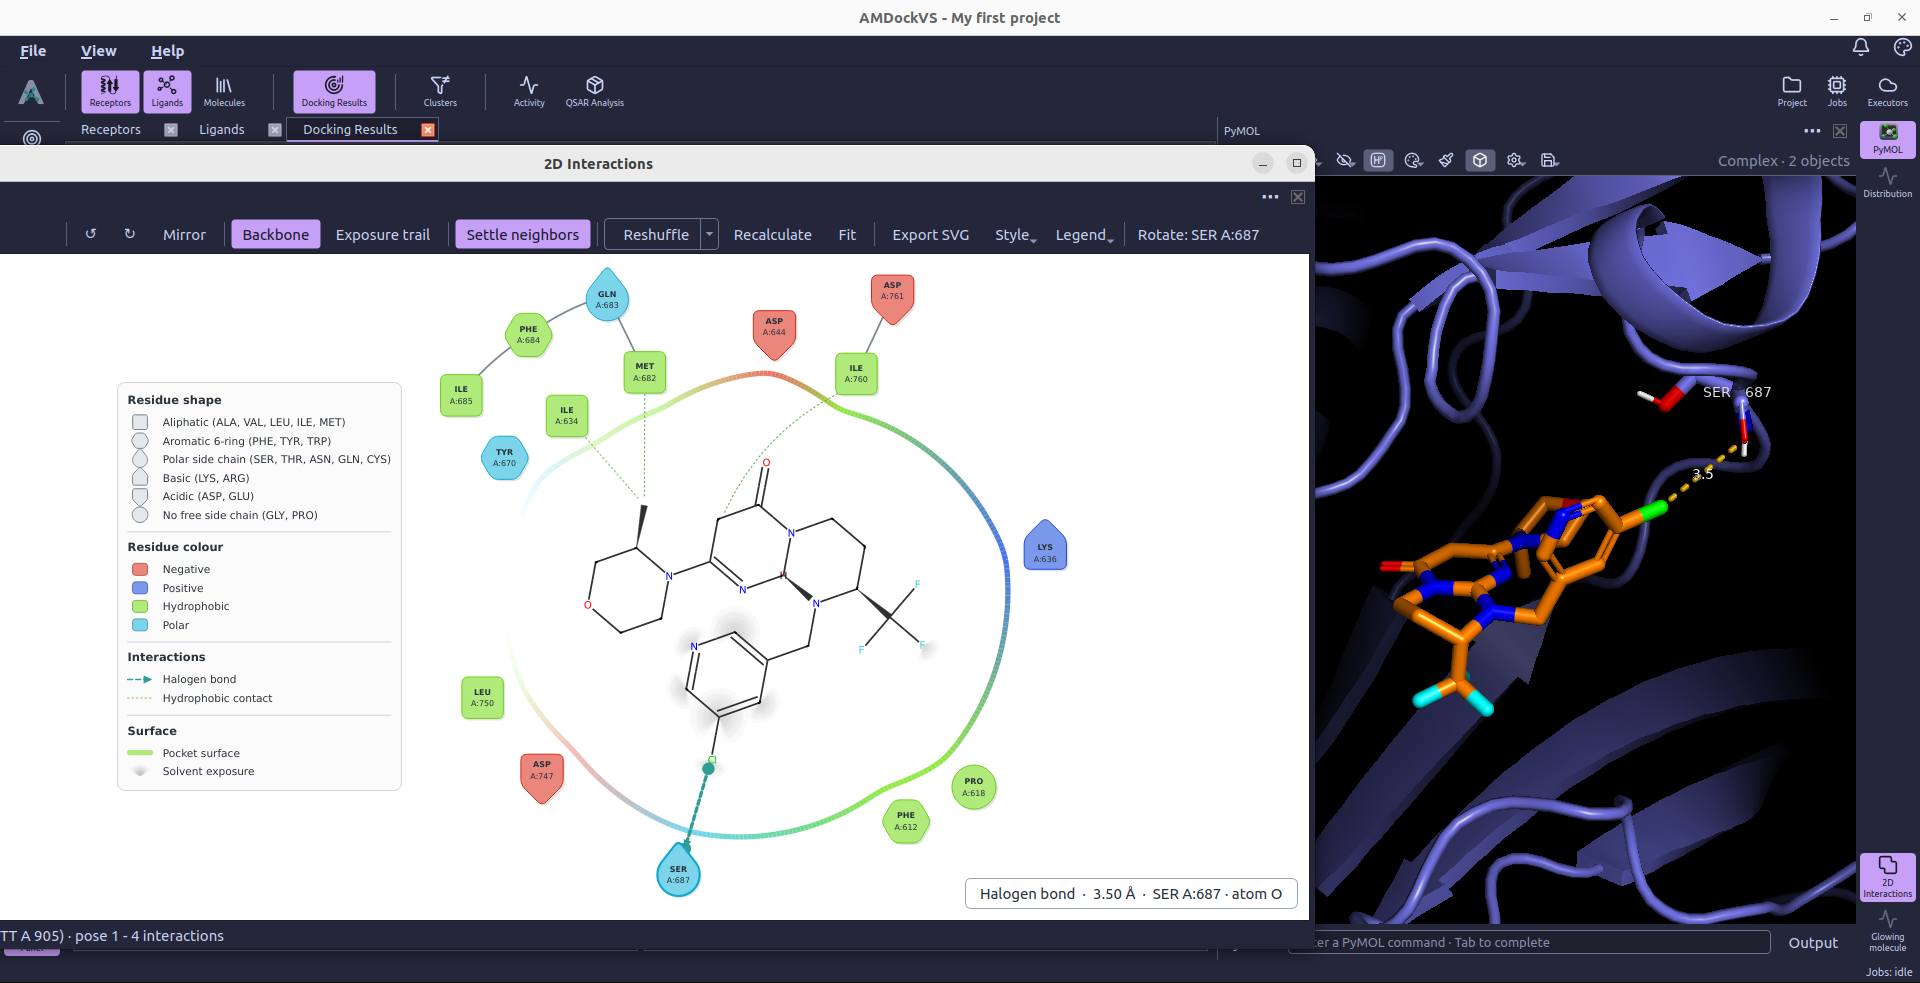
The diagram is fully interactive, click on the three dots in the top right corner of the panel to open it in a window and access all the controls:
- Scroll to zoom and drag with the middle mouse button to pan.
- Drag a residue to reposition it in the layout.
- Use ↺ and ↻ to rotate the selected element; Mirror changes the ligand's diagram orientation.
- Settle neighbors adjusts the rest of the layout after rotating an element.
- Reshuffle generates another arrangement, and Recalculate rebuilds the layout.
- Fit fits the diagram to the panel again.
These controls edit the diagram layout; they do not move atoms in the saved docking pose. The toolbar also provides backbone, solvent-exposure, legend, and style controls.
5. Set defaults and export
Use Defaults... in the diagram's settings menu to open the application's MS-ContactMap settings. These configure the diagram's appearance, including glyphs, colors, and surface and exposure styling.
Choose Export SVG... to save the displayed diagram as a vector image. The export reflects the current arrangement, including manual layout adjustments. For a 3D image of the same pose, use PyMOL's export.